Stunning Basement Remodels by Expert Contractors

Picture this: a warm, light-filled basement where the kids’ laughter drifts up the Stairs, game-day sound shakes the couch (in a good way), and the guest suite finally has its own bathroom so your in-laws don’t have to shuffle upstairs at midnight. That’s what a thoughtful remodel does. It turns the “downstairs” into the place everyone actually wants to be. If you’re a homeowner in Salt Lake County, Davis County, or Utah County, you’ve got a secret weapon under your feet—and with the right team, that space can be both beautiful and practical. Let me explain how stunning basement remodels come together, and why working with expert basement contractors in Utah matters more than you might think.


Why Utah basements are the smartest room in the house

There’s a reason basements are beloved along the Wasatch Front. Our winters hang around; our summers are bright and busy; and space comes at a premium. A finished basement keeps your family close while giving everyone room to breathe. It’s also one of the most Cost-effective ways to add livable square footage without moving, especially in established neighborhoods in Holladay, Sugar House, Farmington, or Pleasant Grove.

There’s a quieter reason, too: comfort. A well-finished basement is calm. It’s cooler in July, cozy in January, and easy on the ears. When planned right, it becomes the flexible heart of the home—part hangout, part retreat, part “let’s host the whole crew for the Jazz game” zone.

Here’s the thing: lots of basements look nice for a year or two, then start feeling chilly, musty, or cramped. Stunning basements hold up year after year, because the work behind the walls is as good as the stuff you can see. That’s where experienced contractors earn their keep.


What “stunning” really looks like

Everyone says they want a gorgeous finish. But what does that actually mean? We think it’s a mix of design, durability, and everyday ease. It should feel natural—like the basement was always meant to look and function this way.

Game-day lounge and movie nights

Think layered lighting, a low-glare paint finish, and prewired surround sound so the cords don’t hijack the vibe. We like to frame in a shallow media wall to hide components, with ventilation that keeps gear cool. Add resilient underlayment beneath carpet tiles or luxury vinyl plank to cut vibration. Boom—cozy without the booming echo.

A real guest suite, not a spare bed

Guests relax when they have a decent bathroom, decent light, and a door that closes quietly. That means an egress window with a deep well to bring in morning sun, a bath with a quiet fan, and smart storage. In some cases, families build an in-law suite or short-term rental space. Codes vary city to city, but thoughtful planning makes it feel private and safe.

Gym or studio space that you’ll actually use

Rubber flooring, reinforced wall blocking for racks, and a simple ceiling fan do more than you think. If you ride a bike trainer or rower, we’ll talk vibration control. If you practice yoga, we can fit warm dimmable lights and a niche for mats. Small details decide whether you’ll use the room daily or skip it after week three.


The unglamorous heroes: moisture, warmth, and quiet

Honestly, this is where remodels succeed or stall. Pretty finishes won’t matter if the space is damp or loud. We design from the inside out, especially for older homes along the benches and newer builds in Saratoga Springs or Syracuse where soil conditions differ.

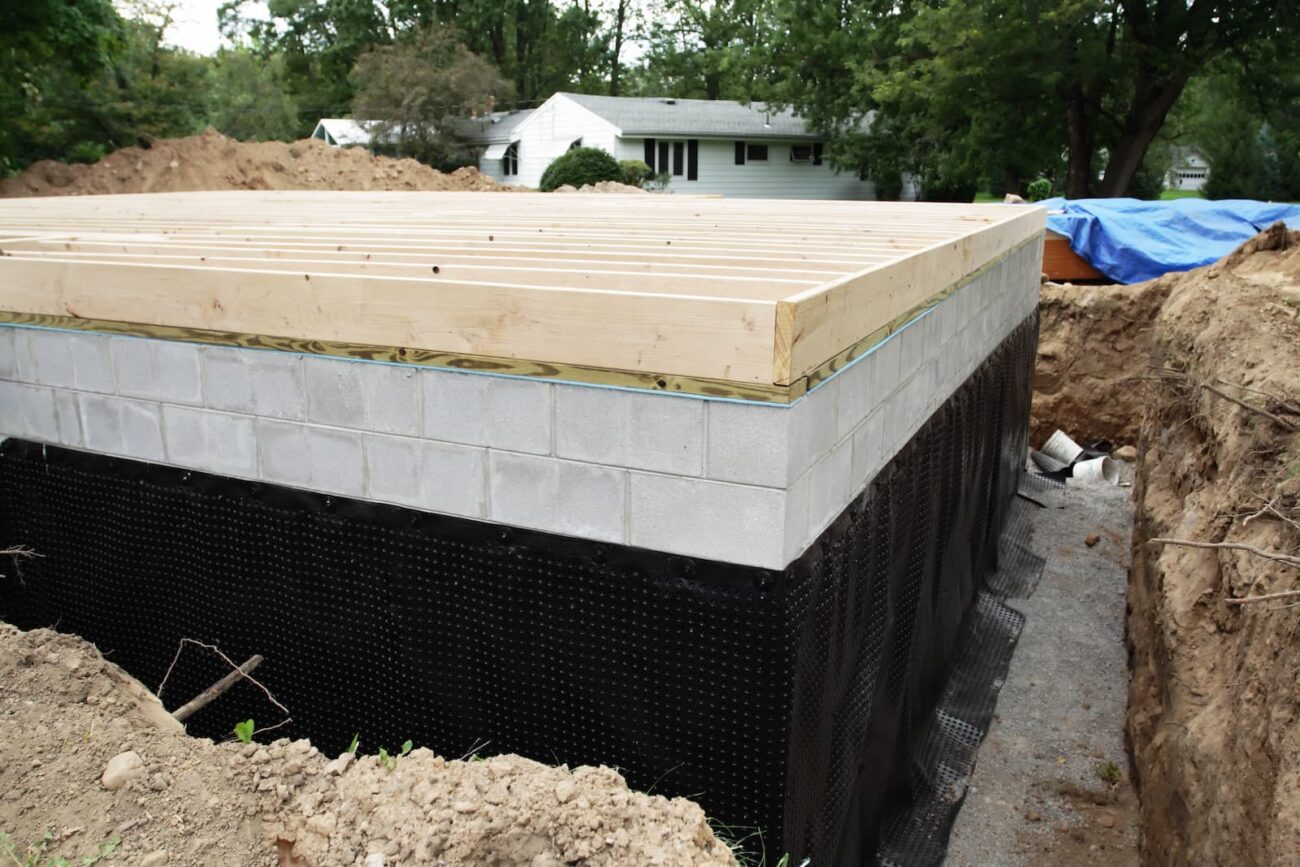
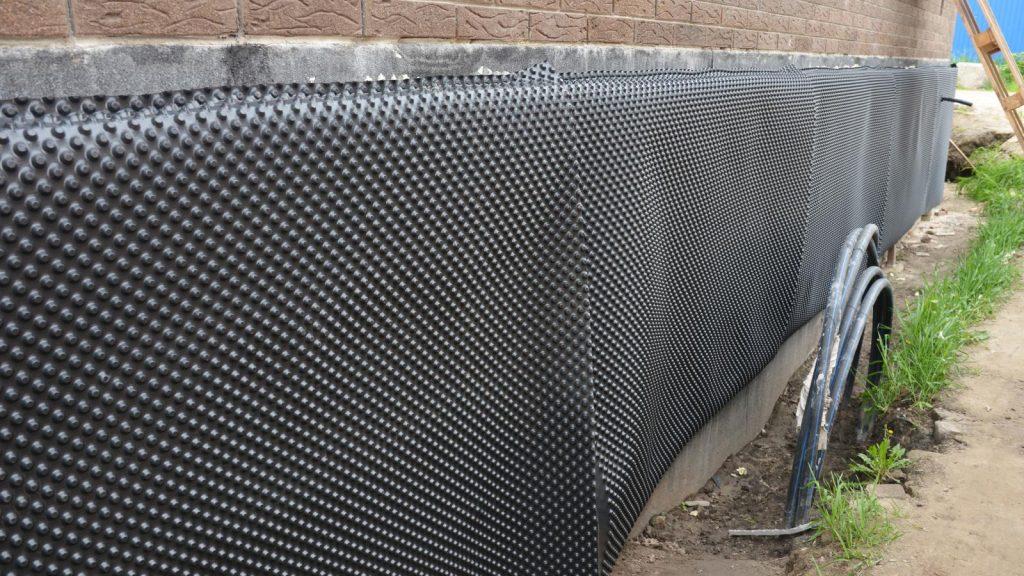
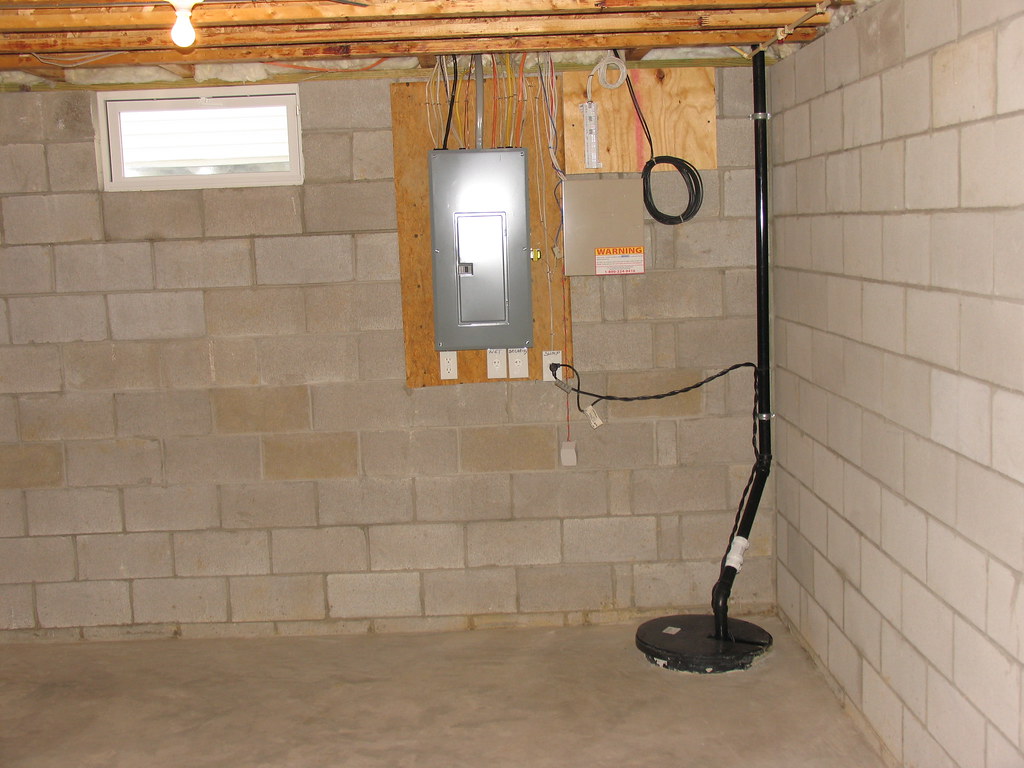
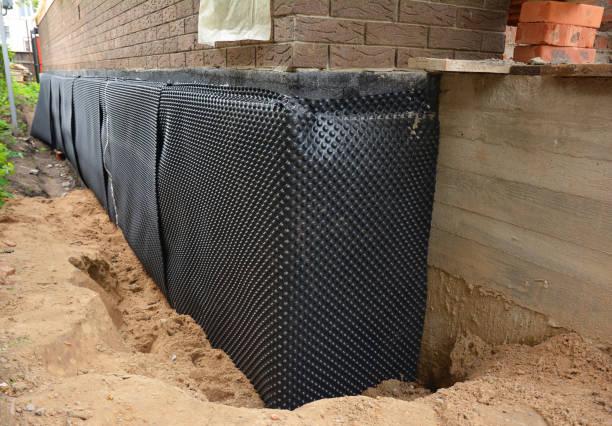
Moisture control: We look for hairline cracks, check slope around the foundation, and review existing drains. Proper sealing, vapor barriers under new slabs (when applicable), and sump systems are boring to talk about—until they save the carpet during a freak storm. Utah’s soil and snowmelt can surprise you; we plan for it.

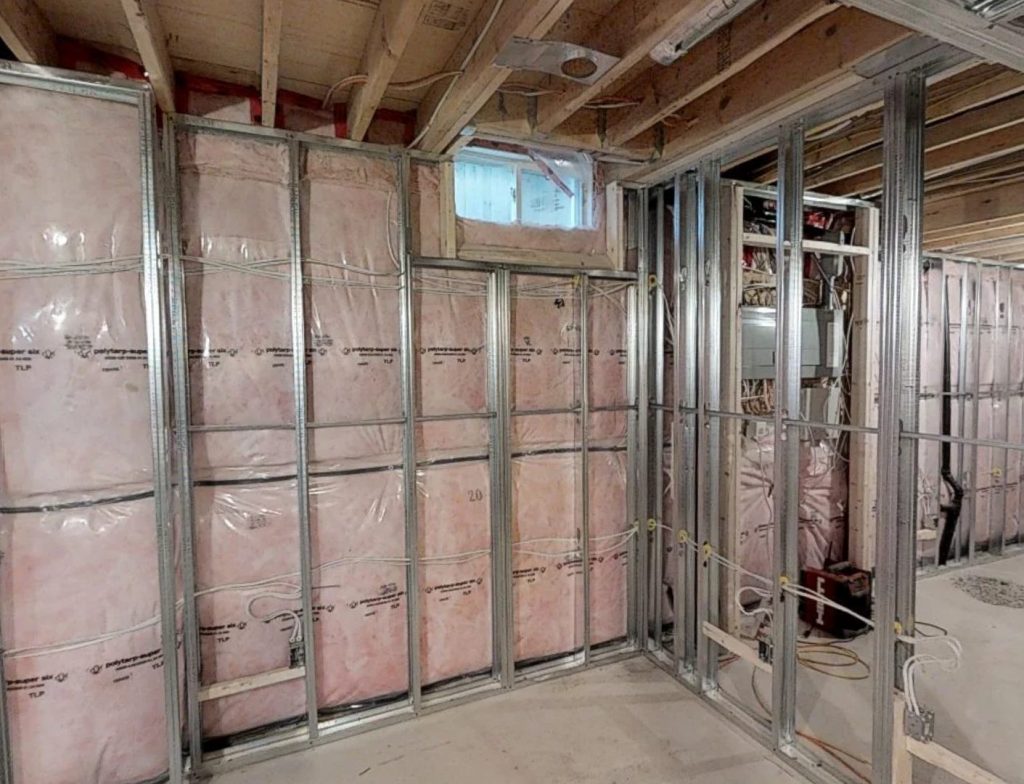
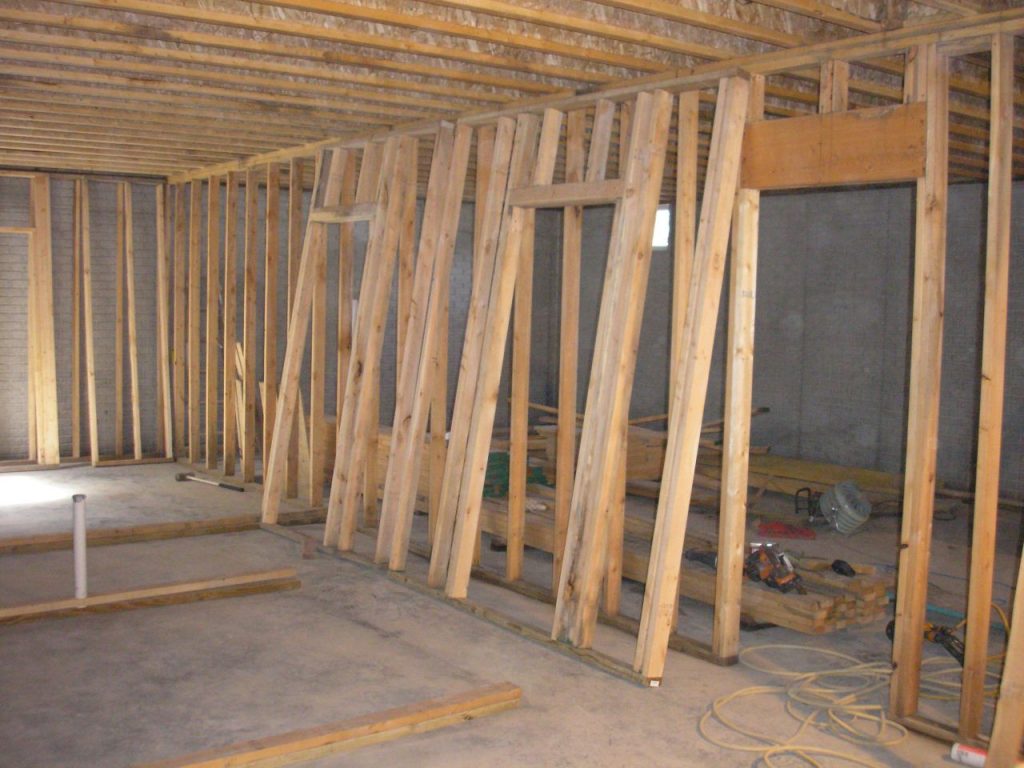
Warmth and insulation: On exterior walls, foam board or mineral wool helps stop cold spots. We aim for continuous insulation, sealed penetrations, and proper rim-joist treatment. You’ll feel the difference on your toes in January. For many homes, adding dedicated HVAC zoning with a return-air path keeps the basement temp steady without freezing the upstairs.

Sound control: We use a mix of mineral wool, resilient channel, and double drywall in key areas. No, you don’t need a recording studio everywhere. But quiet Bedrooms and a quiet office? Worth it. It’s not expensive when done early and makes family life easier.


Permits, codes, and safety across Salt Lake, Davis, and Utah Counties

It’s tempting to skip the paperwork. Here’s our gentle contradiction: permits can feel slow, but they speed things up. Inspectors catch issues early. You sleep better. And if you sell, your work is documented.

Egress Windows: Bedrooms need egress windows (usually a clear opening around 5.7 sq. ft. with specific height/width minimums). Window wells need ladders past a certain depth. We size these carefully and handle drainage so wells don’t become bathtubs during spring rain.

Ceiling height: Most areas follow a 7-foot minimum for finished spaces, with exceptions under beams and ducts. We route mechanicals with care to keep sightlines tall and rooms airy.

Smoke and CO alarms: Interconnected alarms are required. We tie into existing systems or add new ones as needed, especially near bedrooms and mechanical rooms.

Electrical and plumbing: GFCI protection, dedicated circuits for equipment, and proper venting are a must. We work with inspectors from Salt Lake City, West Jordan, Bountiful, Layton, Lehi, and Orem all the time. Friendly relationships help, but straight, code-compliant work is what gets approvals.

Worried about radon? We can test. If levels are high, a mitigation system is simple to install during the remodel and discreet once finished.


Layouts that squeeze every inch

Basement plans benefit from a clean circulation path and zones that make sense: loud zone, quiet zone, utility zone. That way, a late-night movie doesn’t rattle whoever’s sleeping. We also borrow light. Open stair walls, wider cased openings, and reflective finishes carry daylight farther than you think.

Under-stair storage? Absolutely—pull-out drawers or a reading nook for the kids. A hallway homework station with upper cabinets? Great for backpacks and charging. And yes, you can add a small kitchenette without pretending it’s a second full kitchen; a counter-depth fridge, microwave drawer, and sink equal big weekend wins.

You know what? A simple bench near the bottom of the stairs is underrated. People drop bags there, swap shoes, and keep the couch crumb-free.


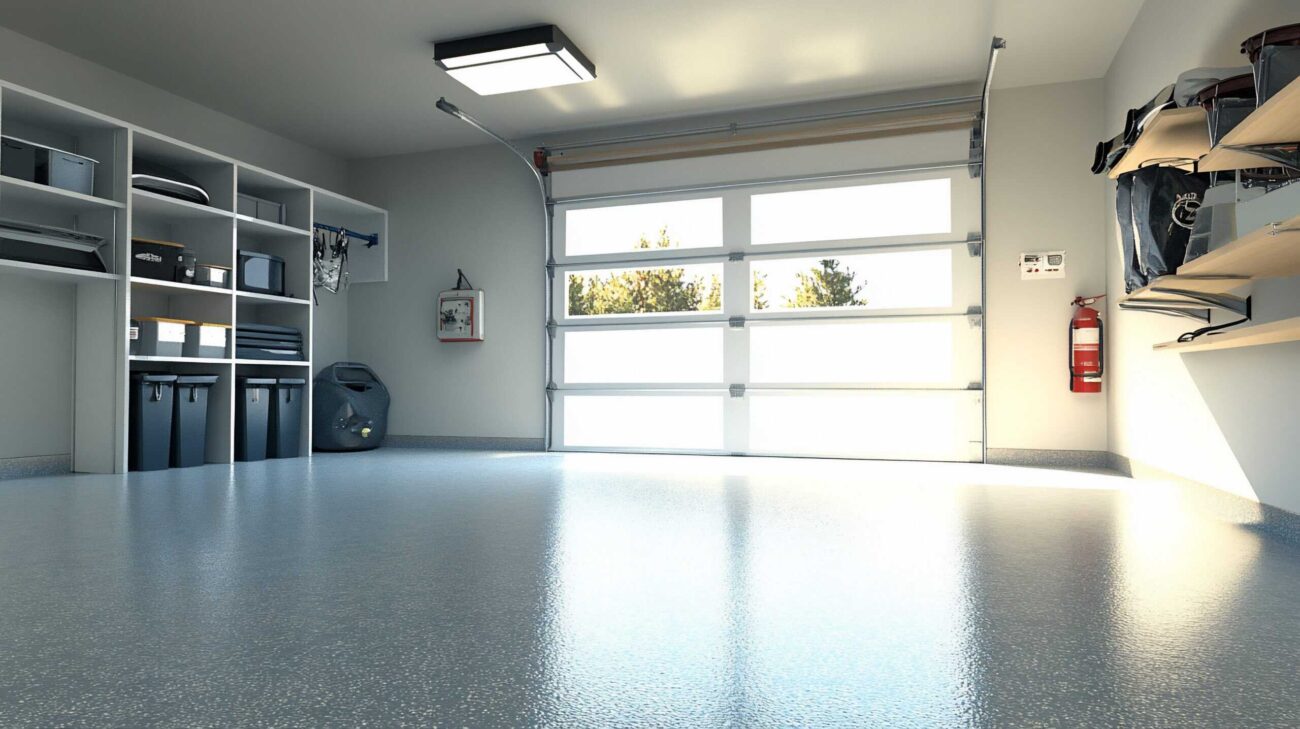
Finishes that look great and still make sense

Flooring: Luxury vinyl plank works hard in basements—stable, quiet with underlayment, and easy to clean. In bedrooms, carpet tiles give warmth and quick replacement if there’s a spill. We use engineered wood in select areas when moisture conditions allow, but floating installations and correct underlay matter.

Lighting: Layer it. Recessed cans on dimmers for overall light, wall sconces or picture lights for softness, and task lighting at Bars or desks. Use warmer bulbs in media areas and neutral white for craft spaces. Black or brass fixtures add character without shouting.

Walls and ceilings: A light eggshell on walls keeps fingerprints manageable; flat finish on ceilings hides imperfections. We sometimes suggest a drywall ceiling plus access panels over critical valves. It’s a neat compromise—clean look, serviceable when you need it.

Built-ins: Shallow built-ins around awkward jogs turn obstacles into storage. We pre-plan with your furniture sizes, so the couch fits and the ping-pong table actually has swing room. Seems obvious; gets missed a lot.


Budget and timeline, straight talk

Every home is different, but patterns help. Here’s a quick snapshot for homeowners along the Wasatch Front. Your numbers may vary based on square footage, structural changes, and upgrades like a steam shower or theater package.

Project type Typical budget range Typical timeline
Finish open basement (family room, bath, 1 bed) $45,000–$80,000 8–12 weeks
Premium finish (theater, wet bar, custom built-ins) $80,000–$150,000+ 12–18 weeks
In-law suite or rental-ready suite $95,000–$180,000+ 14–20 weeks

Why the spread? Existing conditions, structural steel or plumbing changes, and product selections. Supply-chain hiccups happen, but we schedule around them with lead-time ordering and clear communication. Short version: surprises are rare when the plan is solid upfront.


How to choose the right contractor

Pretty photos are nice. Reliable process is nicer. When you’re comparing basement contractors in Salt Lake County, Davis County, and Utah County, these points matter more than the slideshow:

  • Licensing, insurance, and permits — Ask for proof. A professional is happy to show it and explain permit steps in your city.
  • Detailed scope and pricing — Clear line items help you see what’s included: insulation type, number of lights, tile allowances, even door hardware.
  • Scheduling discipline — A real timeline with dependencies beats a loose promise. Who’s doing the work and when?
  • Trade partners who care — The electrician, plumber, and drywall crew carry the project. We keep a steady bench that knows local codes and standards.
  • References you can call — Recent clients in your area are gold. Ask how communication went and how clean the site stayed.

One more tip: If a bid seems way lower than the pack, something’s missing—scope, materials, or schedule buffer. There’s saving money, and then there’s borrowing problems from your future self. We try to avoid the latter.


We’re a local team that focuses on, well, basements. It’s our lane. From the benches in Bountiful to the cul-de-sacs in Draper and the new builds in Vineyard, we’ve seen it all. Our process is simple and thorough:

  • Listen and measure — We walk your space, hear your wish list, and flag anything structural or mechanical right away.
  • Design and budget — Floor plan, finishes, smart changes to save money, exact scope with allowances that make sense.
  • Permits and prep — We handle the paperwork and order long-lead items so the schedule stays tight.
  • Build and protect — Daily site cleanup, dust control, and respectful crews. You’re living here—we act like it.
  • Walk-through and warranty — Punch list tackled, instructions provided, and ongoing support if anything pops up.

It’s not flashy, but it works. Projects finish as planned, and families get their homes back faster.


Quick project snapshots along the Wasatch Front

Sandy media basement: A low-beam area threatened to cramp the room. We re-routed ductwork, added a soffit detail with LED cove lighting, and stretched the ceiling height where it counts. Now it’s movie-night central with a tucked-away snack bar.

Kaysville in-law suite: Aging parents needed easy access. We created a large shower with a low curb, lever handles, and grab-bar blocking hidden in the walls for future use. A quiet mini-split system keeps the suite comfortable without affecting the rest of the house.

Lehi playroom-plus-office: Kids needed space, parents needed quiet. We added resilient channel and mineral wool above the office while leaving the playroom open and bright. Built-in cubbies along the stair wall swallow school clutter without eating floor space.


Seasonal touches Utah families love

Winter hits hard, so radiant heat mats in select bath floors are a small luxury that feels big at 6 a.m. After ski days at Brighton or Sundance, a boot-drying nook by the exterior walkout makes life easier. For summer, we love installing a drinking fountain by the home gym or bar—one of those upgrades that feels fancy but saves a hundred plastic bottles.

And if you host tailgate-style watch parties for the Utes or Cougars, a small undercounter ice maker tucked into the bar is quietly legendary.


FAQs we hear all the time

Can we finish in phases to match our budget?
Yes. We can rough-in plumbing and electrical for a future bath or bar, then finish the family room now. Smart phasing avoids rework later.

Will the basement feel dark?
Not if we plan for light. Egress windows, glass doors on offices, wider openings, and layered lighting keep the space bright. Light floors help, too.

What about low ceilings and awkward ducts?
We’ve tamed plenty. We consolidate ducts when possible and create soffits that look purposeful, not like a patch job. Painted ceilings in darker tones can also “disappear” visually in media rooms.

How messy is the process?
There’s noise and dust—no way around that—but we contain it with plastic barriers, zip walls, floor protection, and daily cleanup. Communication helps the most, so we check in often.

Do you handle permits and inspections?
Absolutely. We coordinate with city officials from Salt Lake County to Davis County and Utah County and schedule inspections to keep the project moving.


Ready to see your basement differently?

If you’re ready for a space that feels good, functions well, and looks sharp year after year, we’d love to help. Call us at 801-515-3473 and talk with a real person about your goals. Want numbers fast? Request a Free Quote and we’ll map out a clear plan that fits your home and your budget.

Source

Disclaimer: all images are owned and copyright by their respective owners and website (utbasementfinishing.com) and “https://madcitybasement.com/blog” is for news, information, product news and reviews.

Kinsley Landscape Ltd. Vancouver Company Online Ratings and Reputation

Services Offered
  • Complete landscaping services
  • Retaining Walls
  • Hardscaping & Interlocking Paving Stones
  • Softscaping, including New Lawns, Artificial Turf and Sod
  • Water Features
  • Snow Removal & De-icing
  • Carpentry (Decks, Fences, Pergolas, etc.)
  • Landscape Maintenance, Lawn & Garden Care
  • Residential Strata and Commercial Property Maintenance
  • Strata and Commercial Landscaping Services
Business Description

Building from the Roots in Maple Ridge

Kinsley Landscape Ltd. is a professional and family-run landscape construction and maintenance company located in Maple Ridge, BC. They proudly work with homeowners and businesses throughout the Greater Vancouver and Fraser Valley areas.

Founded by owner Nick Sweryda, the company is built on more than two decades of hands-on experience in the landscaping industry. After co-owning a previous landscaping business and gaining extensive technical and project management expertise, Nick launched his own company in 2020. That same year, he welcomed his daughter Kinsley, whose name became the inspiration behind the business name.

Since opening its doors, Kinsley Landscape has expanded quickly, taking on a wide range of residential and commercial projects. Their construction services include fibreglass pool installations, retaining walls, paving stone patios, custom gardens, water features, ponds, landscape lighting, irrigation systems, fencing, decks, turf installations, and more.

The lawn care and landscape maintenance division offers dependable weekly service for homes and commercial strata properties, helping keep landscapes healthy and well-maintained year-round. During the winter months, the team also provides snow removal and salting services to ensure safe and accessible properties.

In just over five years, Kinsley Landscape has built a solid reputation in the Lower Mainland for its exceptional work and service. If you have ideas for your dream outdoor living space or need help maintaining your property, contact Kinsley Landscape!

Source

Disclaimer: all images are owned and copyright by their respective owners and website (blog.renovationfind.com) and “https://madcitybasement.com/blog” is for news, information, product news and reviews.

Interior vs. Exterior Waterproofing: Which One Actually Works Best?

Basement waterproofing is used to prevent water from entering your home. It involves applying sealant materials, installing drains and sump pumps, and other components. You can waterproof your basement in one of two ways: internally or externally. In this guide, the professional contractors at Harmony Basements highlight the pros and cons of interior basement waterproofing vs exterior basement waterproofing, why waterproofing is important, our expert recommendations, and more.

Why Is Waterproofing Important?

Your home is far too valuable and far too sizable an investment to not properly protect it from the dangers of heavy rainfall. Water in the basement can lead to issues such as mold and mildew, ruined furniture and belongings, stained and damaged walls and floors, rotting, rusting, and musty smells. Even small water leaks can lead to longer term, more impactful health problems like difficulty breathing, fever, skin rashes, fatigue, eye irritation, headaches, and coughing.

For this reason and many more, waterproofing your basement is so important. This construction technique prevents flooding, water leaks, contaminant leaks, and water pooling from entering your structure, helping your building maintain its structural integrity for longer. If your house is compromised, it’s critical you get rid of the water as soon as possible, fix underlying basement water problems, and take the appropriate next steps to keep your basement dry moving forward.

What Affects the Cost of Waterproofing?

Image of Basement sound insulation

The cost of basement waterproofing depends on multiple factors. These include the size and condition of your basement, the method selected, the extent of existing water damage, and how accessible the foundation is from outside.

Interior waterproofing generally requires less labor and can often be installed more quickly, while exterior basement waterproofing involves excavation and restoration, making it a more complex undertaking.

What is Interior Waterproofing?

Interior waterproofing is when you waterproof the basement from inside your home. This indoor system will redirect any water that leaks into your basement before it touches the floor. For interior waterproofing to operate, it needs a sump pump and a water drainage track. It works by sealing the inside of your basement floors and walls so water that tries to enter is channeled out.

Fortunately, interior waterproofing offers many benefits, including:

  • Fast installation – only taking a day or two to complete
  • Non-disruptive – No excavation is necessary, so you won’t have to worry about digging up your driveaway or causing damage to your landscape
  • Lower costs – Interior waterproofing is less expensive compared to exterior waterproofing
  • Trouble-free service – Interior waterproofing can be easily maintained year-round since it’s located indoors

Conversely, the downside of interior waterproofing is that this method requires you to move any furniture, stored items, and built-in shelving or cabinets away from touching the basement walls. Plus, you cannot use your basement during installation.

What is Exterior Waterproofing? 

Exterior waterproofing is a construction method designed to seal your home from the outside, preventing water from accessing the inside of your property. It involves digging a trench, about 8 to 10 feet down, around your entire house to the bottom of your foundation.

A waterproof membrane or sealant is then used to cover, seal, and clean the foundation walls. The process is capped off by installing a drainage system to direct water away from your home for good.

Exterior waterproofing your basement offers a few advantages, including:

  • It’s the best, most complete way of protecting your home from a basement leak or flooding
  • It’s a relatively fast and efficient process – could be one day, or one to two weeks, depending on the size of the project

On the other hand, exterior waterproofing has its drawbacks, including:

  • Increased costs – It’s a more involved process that is expensive and time-consuming. Digging up your yard for example can be costly and labour intensive
  • Damages landscaping or hardscaping elements – Since exterior waterproofing requires everything surrounding the house to be removed, features such as driveways, porches, walkways, landscaping, decks, AC units, and so on have a greater chance of getting damaged in the process
  • Not serviceable – Unfortunately, there isn’t much action you can take to correct or fix if water is still entering your basement. If any of the work was done incorrectly, your only alternative is to pay to dig up all that soil again

What Are Some Key Differences Between Exterior and Interior Waterproofing?

Exterior and interior waterproofing are both effective methods of protecting your home from water damage. Despite their similarities in their purpose, the biggest difference between the two methods is exterior waterproofing is a preventative solution, whereas interior waterproofing is a corrective solution.

A couple other differences between exterior and interior basement waterproofing are:

Can You Combine Interior and Exterior Waterproofing?

Yes, and in many situations, a combined system offers the most complete protection. Interior and exterior waterproofing aren’t mutually exclusive. In fact, they complement each other. While exterior systems prevent water from entering the foundation walls, interior systems act as a backup to capture and redirect any moisture that does make it inside.

For example, homes with high water tables or those in flood-prone areas may benefit from an exterior membrane system paired with an interior weeping tile system to manage interior water flow. This dual-layer protection helps keep basements dry even in challenging conditions.

How Waterproofing Works

Interior Waterproofing:

  • Involves installing a drainage channel along the inside perimeter of the basement floor
  • Water is collected and directed to a sump pump that removes it from the home
  • Waterproof interior basement walls may be lined or coated to reduce moisture intrusion

Exterior Waterproofing:

  • Requires excavation around the home’s foundation
  • Foundation walls are cleaned, sealed, and coated with a waterproof membrane
  • A drainage system (e.g., weeping tile) is installed to guide water away from the structure

These two methods approach waterproofing from different angles, but both aim to prevent water from causing structural or surface damage. Whether you’re considering waterproofing basement from inside or outside, it’s important to assess which method aligns with your specific situation.

What We Recommend Regarding Waterproofing

It’s essential we analyze your home to provide the best recommendations for how to go about waterproofing your basement.

First, a Harmony Basements professional will perform a full analysis of the following areas:

  • The inside of your basement
  • The outside foundation of your home
  • The condition of the eavestroughs and window wells
  • The grade of the earth up against your home’s foundation
  • Whether there is anything else close to your home that is storing excess water

Lastly, our contractors will even look at any neighbouring homes and their proximity to your property before making our basement waterproofing recommendation.

FAQs

Can you waterproof a basement from the inside?

Yes. Interior waterproofing manages water after it enters by redirecting it through drains and sump pumps. It is often more cost-effective and less disruptive than exterior methods. It’s one of the most common methods used for basement waterproofing from inside.

How to waterproof a basement from outside?

Exterior waterproofing involves excavating the soil, sealing the foundation walls, and installing drainage systems to stop water before it reaches the interior. This method is key when interior waterproofing isn’t enough to prevent water intrusion.

What is an interior weeping tile system?

An interior weeping tile system is a perforated pipe installed along the inner perimeter of the basement floor. It collects water and routes it to a sump pump for removal. It is often a component of internal waterproofing systems.

Is interior waterproofing enough on its own?

In some cases, yes. For moderate moisture problems or finished basements, interior waterproofing is effective. However, severe hydrostatic pressure or foundation issues may require exterior intervention.

Are warranties common with basement waterproofing?

Yes. Reputable waterproofing contractors typically offer warranties covering both materials and workmanship. The coverage length and conditions vary, so it’s important to review the details carefully.

Does soil type affect waterproofing needs?

Definitely. Clay soils hold water longer, increasing pressure on foundation walls. Sandy soils drain faster, which may lessen the need for exterior systems.

What’s the difference between internal waterproofing and exterior waterproofing?

Internal waterproofing controls water that has entered the basement, while exterior waterproofing prevents water from getting in to begin with. Internal waterproofing is often the preferred option for finished basements.

Do I need waterproofing if I don’t see water?

Yes. Musty smells, wall discoloration, or high humidity can indicate hidden moisture issues. Early action can prevent major damage. In such cases, reviewing waterproofing pd reviews can also help guide your decision.

Will waterproofing damage landscaping?

Exterior waterproofing typically involves excavation, which can temporarily impact landscaping. Interior systems, however, do not disturb the yard.

Is waterproofing a permanent solution?

With proper installation and maintenance, waterproofing systems can last decades. Regular inspections and functional drainage are key to long-term success. Whether you opt to waterproof basement from inside or install a full exterior system, durability depends on upkeep.

Still Have Questions About Waterproofing?

Today we covered the differences between exterior vs interior waterproofing and why basement waterproofing in general is so important. In any case, both methods require experienced contractors to aptly handle installation. If you’re still not sure however which type of waterproofing is right for you and your home, we’re here to help! For over 20 years, Harmony Basements has delivered high-quality interior and exterior waterproofing services all over the GTA. We use first-rate materials and innovative techniques to keep your basement dry well into the future.

Contact us today to learn more about basement waterproofing and speak with an expert of ours to schedule your free, at-home inspection and consultation.

by Iurii


Source

Disclaimer: all images are owned and copyright by their respective owners and website (harmonybasements.ca) and “https://madcitybasement.com/blog” is for news, information, product news and reviews.

DIY Basement Finishing Without Breaking the Bank

There’s a good chance your basement is the most underused square footage in your home. And around the Wasatch Front, that space matters—more room for kids, guests, workouts, hobbies, or just a quiet corner where you actually finish a book. The good news? DIY basement Finishing doesn’t have to drain your savings. With a plan, a few smart material choices, and a clear idea of what to DIY versus what to hire out, you can build a comfortable, safe space without stress. Let me explain how homeowners in Salt Lake County, Davis County, and Utah County are doing it—step by step, without fancy fluff.


Is DIY Basement Finishing Right For You? Quick Reality Check

Honestly, a basement is one of the easiest places to add livable space. It’s close to existing utilities and already framed by concrete walls. But it’s not a slap-it-together project. You’ll need time, patience, and a willingness to learn. If you’re comfortable with a drill, a saw, and YouTube tutorials, you’re halfway there.

Here’s the thing—some tasks are perfect for homeowners: framing simple walls, laying luxury vinyl plank, painting, installing trim, and even hanging doors. Other items are usually smarter to hire out: full electrical panels, HVAC duct changes, and cutting an egress window. That doesn’t mean you can’t tackle parts of those jobs. It means you choose where DIY saves money and where pros save headaches.

In Utah, homeowner permits are available in many areas, but codes still matter. If you’re in Salt Lake County, Davis County, or Utah County, your city will outline what you can do yourself. A quick call to your building department before you swing a hammer can save you a week and a few gray hairs.


Plan First, Spend Less: Use Zones, Not Wish Lists

You don’t need a blueprint worthy of a TV reveal. You need a sketch with sizes and zones. Think: TV nook, play area, guest room, small gym, storage. Keep major plumbing and electrical where they are—moving them costs more. If you want a wet bar or bathroom, place it near existing drains.

Walk the space at night and in the morning. Where does natural light land? How low are the ducts? What squeaks from upstairs drive you nuts? These details help you decide ceiling type, lighting layout, and soundproofing later.

Budgeting That Actually Works

  • Pick a ceiling finish early. Drywall looks sleek; a modern drop ceiling gives you access. Both are right. The “wrong” choice is the one that surprises you during a leak.
  • Set a 10–15 percent cushion. You’ll discover a crooked wall or a wonky pipe. You will. Plan for it, and you won’t panic.
  • Phase the work. Do framing and insulation now; finish a bedroom and hall next month; leave the theater details for later. Phasing keeps cash flow sane.

You know what? A simple spreadsheet beats a fancy app. Track materials, permits, tool rentals, and “uh-oh” costs. Small oversights snowball. Written budgets keep you honest.


What Stuff Really Costs Around the Wasatch Front

Prices change with seasons and supply, but these ranges reflect what we see locally for a budget basement remodel where homeowners do most of the work and hire specialists for safety-critical items.

Item DIY Cost Range Hire-Out Cost Range
Framing walls (per linear foot) $3–$6 $10–$18
Rigid foam + mineral wool (per wall sq ft) $1.75–$3.50 $4–$7
Drywall hang + finish (per sq ft) $0.75–$1.50 $2.50–$5.00
Luxury vinyl plank (per sq ft) $2–$4 materials $4–$8 installed
Drop ceiling tiles + grid (per sq ft) $2–$3.50 $4–$7
Lighting circuit + fixtures (per room) $120–$350 materials $600–$1,500
Egress window cut + well N/A $2,000–$5,500

Not everything belongs in the DIY column. It’s okay to split the work. Have a pro tackle the egress and main electrical, and you take the rest. That balance often saves the most.


Permits And Utah Code Quirks Made Simple

Permits sound scary. They’re not. They protect your family and your home’s value. Inspectors in Salt Lake County, Davis County, and Utah County are generally helpful, especially with homeowner projects.

  • Egress for Bedrooms. Any sleeping room needs an egress window with a clear opening around 5.7 sq ft, minimum height/width clearances, and a reachable sill. Not optional.
  • Ceiling height. Target 7 feet minimum; drops for beams or ducts can be lower in small areas. Plan soffits cleanly.
  • Electrical protection. Most living areas need AFCI; Bathrooms and Bars need GFCI at outlets within 6 feet of a sink. Outlets spaced so no point on a wall is more than 6 feet from one.
  • Smoke and CO alarms. Hardwired with battery backup, interconnected; add units outside bedrooms and on each level.
  • Insulation strategy. Against concrete, use rigid foam (EPS or XPS) or closed-cell spray foam to prevent condensation. Skip interior poly sheeting. Add mineral wool or fiberglass in the stud cavity. In our dry climate, this system works.

There’s a common myth that basements need plastic vapor barriers against concrete. That traps moisture. Foam first; studs second; then cozy insulation. Different path, better result.


Moisture Is The Boss: Manage It First

Before a screw hits a stud, check for water. After a storm, look for damp spots. Tape a 2×2 foot piece of plastic to the slab overnight; if it fogs on the underside, your floor needs a moisture-smart approach.

  • Outside fixes matter. Extend downspouts, improve grading, and check sprinklers. Many “basement leaks” are sprinkler overspray on foundation.
  • Seal smart. Fill hairline cracks with polyurethane sealant. Add a sill gasket under bottom plates as a capillary break.
  • Subfloors help comfort. DriCore, Barricade, or a simple foam underlayment under LVP reduces cold and handles minor vapor.

Utah note: a lot of homes here test positive for radon. Pick up an inexpensive test from AirThings or a charcoal kit. If levels are high, a mitigation fan and sealed sump lid make a huge difference. It’s not overkill; it’s peace of mind.


Smart, Tough Materials That Stretch Your Budget

Skip “cheapest possible.” Choose “right price, long life.” It’s cheaper over time.

  • Walls. 1–2 inches of rigid foam on concrete, then 2×4 studs with mineral wool. Finish with mold-resistant drywall for baths or laundry zones.
  • Floors. Luxury vinyl plank clicks together fast, survives spills, and looks sharp. Carpet tiles in a playroom are cozy and repairable.
  • Ceilings. Drywall is clean. A modern drop ceiling gives access to valves and wires. Here’s the contradiction: drywall “feels” nicer—but when a valve leaks, you’ll wish you chose tiles. Pick your risk.
  • Lighting. LED recessed wafers are thin, bright, and easy. Use 2700–3000K for warm family areas; 4000K for gyms and craft rooms.
  • Sound control. Mineral wool in ceilings, plus a bead of acoustic caulk at drywall seams, softens footfall noise from upstairs.

Local tip: watch the ReStore in Salt Lake and Kaysville for leftover doors, cabinets, and fixtures. Utah’s remodel pace means great finds show up often.


Framing, Insulation, And Comfort: The Order That Works

Work in this sequence and the whole job feels smoother:

  1. Snap chalk lines on the slab; square your first wall with a 3-4-5 triangle.
  2. Lay foam against concrete walls; tape seams; seal edges with foam.
  3. Set pressure-treated bottom plates with a sill gasket; use Tapcons or powder-actuated fasteners.
  4. Frame 2×4 walls 16 inches on center; keep studs 1/2 inch off the foam; plumb and anchor the top plate tight to joists.
  5. Add fire blocking at 10-foot intervals and at top plate transitions using 3/4-inch plywood, mineral wool, or foam with sealant.
  6. Run wires and low-voltage before insulation; photograph walls for future reference.
  7. Insulate with mineral wool; install drywall; don’t forget the acoustic caulk bead at perimeter.

That tiny air-seal step—foam and caulk—feels fussy. It’s not. It’s what makes basements quiet and warm in January.


Electrical And HVAC: Doable, With Guardrails

Many Utah cities allow homeowners to pull their own electrical permits. If that’s not your comfort zone, have an electrician rough-in circuits and set cans; you handle trim-out and plates.

  • Circuits. Living areas on AFCI; bar or bath outlets on GFCI. Keep a dedicated circuit for a treadmill, fridge, or electronics rack.
  • Layout. Recessed wafer lights every 4–6 feet in a grid; add sconces or lamps for layers. More light beats not enough.
  • HVAC. Ensure supply and return balance. If the main system can’t handle extra load, a compact ducted mini-split or a wall unit can quietly cover the basement zone.

Pro move: add a return in each closed room. Stuffy rooms aren’t cozy; they’re a sign the air can’t circulate.


Finishes That Don’t Drain Your Wallet

Drywall finishing eats time. You can keep it clean by aiming for Level 4 on walls and a smooth Level 5 only where light hits hard, like long hallways.

  • Paint. Use a quality primer. Go eggshell for living spaces, satin in bar or bath areas. Warm whites brighten basements without feeling sterile.
  • Accent walls. Affordable panels, beadboard, or simple slat walls add texture. One wall is enough; let the rest breathe.
  • Built-ins. IKEA boxes plus a custom face frame can look bespoke for a fraction of the cost.

Don’t sleep on doors and hardware. A solid-core door with a simple black lever instantly upgrades the feel. It’s a small splurge with a big payoff.


A Realistic Weekend-By-Weekend Plan

  • Weekend 1. Moisture test, sketch layout, call building department, and gather tools.
  • Weekend 2. Foam on foundation walls; seal every seam.
  • Weekend 3. Frame main walls and soffits; mark door swings.
  • Weekend 4. Electrical rough-in and low-voltage runs; plan for future network drops.
  • Weekend 5. Insulation, fire blocking, and inspection.
  • Weekend 6. Drywall hang; rent a panel lift; invite a friend.
  • Weekend 7. Mud, sand, prime. A little patience here saves miles later.
  • Weekend 8. Flooring, trim, and paint. Then lights, doors, and a celebratory pizza.

Could you move faster? Sure. But this keeps evenings free and budgets steady.


Little Utah-Specific Curveballs To Expect

Our soils expand and contract. Minor slab hairlines are normal. Seal them and move on. Earthquakes? Strap water heaters and keep shutoff valves accessible. Winter work? Plan more drying time for joint compound and paint. Summer? Dehumidify during curing. Also, check sprinkler zones near window wells—overspray can sneak water right where you don’t want it.

And sound from upstairs? Two tricks: mineral wool in the joists and a resilient channel or clips under drywall. It’s not studio-level—but it makes conversations possible.


Common Mistakes That Waste Money

  • Framing tight to concrete. Concrete sweats. Keep the foam layer between concrete and studs.
  • Skipping egress in a “future” bedroom. If a bed might go in there, plan egress now.
  • Too few outlets and lights. You’ll add lamps and hate the cords. Wire it right from the start.
  • Carpet pad on bare slab. Feels okay at first; holds moisture later. Use a proper underlayment or subfloor.
  • No access panels. Hide valves cleanly behind a matching panel. Future-you will say thanks.

Small choices become big annoyances. The fix is almost always simple planning.


Tools That Make DIY Feel Professional

You don’t need a contractor’s trailer. A tight kit does the job:

  • Combo drill/driver set. Ryobi, Ridgid, or DeWalt get it done.
  • Oscillating multi-tool. For clean cuts around boxes, trim, and tight spots.
  • Laser level and chalk line. Straight lines save hours of cursing later.
  • Kreg pocket-hole jig. Fast, strong assemblies for built-ins.
  • Shop vac with HEPA bag. Keep dust down; your lungs will notice.

Rent specialty tools—drywall lifts, flooring rollers, or breakers for egress work. Short rental, long-term gains.


Hybrid Approach: DIY Where It Counts, Hire Where It Helps

There’s no prize for doing every task yourself. The real win is a safe, comfortable basement that fits your budget. Many homeowners ask us to handle egress Windows, rough framing, or inspections while they tackle paint, floors, and trim. That’s a smart split. It speeds things up and keeps costs reasonable.

If you’re unsure about the order, materials, or code, we can sketch a plan that you can actually follow. Sometimes a little guidance saves the most money.


Final Thoughts: You’ve Got This

A basement project feels big until you break it into weekends. Keep moisture under control, plan lighting well, choose forgiving finishes, and don’t be afraid to ask for help on the tricky parts. The payoff is huge—more space, better comfort, and a home that works harder for your family.

Need help getting started or want pricing for the parts you don’t want to DIY? Call Utah Basement Finishing at 801-515-3473, and let’s map a plan that fits your timeline and budget. Or if you’re ready now, tap here to Request a Free Quote“>Request a Free Quote and we’ll get you the numbers fast.

Source

Disclaimer: all images are owned and copyright by their respective owners and website (utbasementfinishing.com) and “https://madcitybasement.com/blog” is for news, information, product news and reviews.

Garage Contractors Calgary | The Garage Store

Choosing the Right Garage Contractor Matters

Not all contractors understand the complexity of garage spaces. Hiring experienced garage contractors Calgary homeowners trust ensures your project is completed correctly, safely, and efficiently.

The Garage Store specializes exclusively in garages, offering expertise that general contractors often lack.


What Professional Garage Contractors Do

Professional garage renovation contractors manage:

  • Design and layout planning

  • Material selection

  • Installation of storage, flooring, and wall systems

  • Project coordination and timelines

This integrated approach prevents costly mistakes and delays.


Local Experience Makes a Difference

Calgary garages require specialized knowledge. From concrete preparation to moisture control, local expertise ensures long-lasting results.

Garage construction Calgary projects benefit from professionals who understand regional building conditions.


Custom Solutions, Not One-Size-Fits-All

Experienced professional garage installers tailor every project to the homeowner’s needs. No two garages — or families — are the same.

Custom solutions improve functionality and maximize available space.


Safety, Quality, and Longevity

Professional contractors use high-quality materials and proven installation methods. This ensures:

  • Secure wall systems

  • Long-lasting flooring

  • Safe storage mounting

Quality craftsmanship protects your investment.


Why Homeowners Choose The Garage Store

The Garage Store has built a reputation in Calgary for:

  • Specialized garage expertise

  • Clean, efficient installations

  • Durable materials

  • Thoughtful design

Our focus is garages — and that focus shows in every project.


Contact The Garage Store

If you’re searching for reliable garage contractors in Calgary, The Garage Store delivers expert service from design to installation. We help homeowners transform garages into organized, durable, and attractive spaces. Reach out today to work with specialists who understand Calgary garages inside and out.

Source

Disclaimer: all images are owned and copyright by their respective owners and website (blog.renovationfind.com) and “https://madcitybasement.com/blog” is for news, information, product news and reviews.

Legal Basement Window Size in Ontario

The basement of any home seems to be a catch-all space, for laundry and for storage, but it can be so much more. Whether you want to upscale your basement for your family or have the space work for you as a rental unit, some things need to be in place long before you start installing windows. To be considered a legal rental unit or living space in Ontario, basement windows must comply with specific safety guidelines. Turning a basement into a bedroom or a self-contained rental unit is a great way to add space or generate extra income, but there are some specific rules that need to be followed when it comes to basement windows. To find out more about what is legal in Ontario, building codes, and what you will need to do to make sure your basement is renovated correctly, read on.

To make sure you have everything in place so you can approach basement renovations in confidence, there are some important points to remember.

Key Takeaways
  • Ontario building codes have been updated for 2025.
  • There are specific requirements for basement windows if there is no exterior door.
  • All windows must comply with the current standards, even if you are replacing windows that met previous standards.
  • Older homes may require significant upgrades to be compliant with current guidelines.

What Is a Legal Basement Window in Ontario?

A legal basement window must meet the minimum standard of 0.35 sq. m. This applies in particular to bedroom windows, regardless of how many rooms are in the basement. The basement bedroom window code in Ontario states that the room must have an egress window unless it has a direct exterior door. In other words, if the basement is one bedroom, or if it is a studio apartment where the bedroom and living space are one room, and if there is no exterior door attached to that room, a legal egress window is required. This means that the external door must lead to the outside, without having to pass through the upper floors of the main house.

Ontario Building Code Basement Window Rules (2025 Update)

The Ontario building code governing basement windows has been updated for 2025. This directly applies to egress windows in spaces where there are no external access doors. The egress window code in Ontario follows the National Building Code of Canada baseline for an unobstructed opening. For older houses, this is critical, as they are often well below the current standards and may require not only larger openings, but structural reinforcements and new wells.

To ensure compliance, especially for insurance purposes, the finished window requires inspection, and while professional licensed contractors are ideal, if you do the work yourself, make sure you follow the guidelines and have the work inspected before occupancy. This applies to partial basement renovations as well as complete renovations.

Whether you are planning on using the space for your family or making it into a separate basement suite, you will need to follow the standards as outlined. For example, if you are putting up walls to create a bedroom, make certain that the window egress follows the guidelines and have them inspected.

Minimum Window Size in Ontario for Bedrooms

second-suite-bedroom-basement

The minimum egress window size in Ontario is a minimum area of 0.35 sq. m. It must provide an unobstructed opening and be openable from the inside without the use of tools. If the basement window opens into a window well, a clearance of not less than 550 mm is required. For sliding windows, the basement window size for the bedroom must meet the minimum size for the openable portion of the window, not the entire window.

Basement Window Height, Width, and Opening Area Requirements

The maximum height of a basement egress window in Ontario, from a finished floor to the sill, is 1.5 m. The minimum egress window size in Ontario is 380 mm. Again, the egress refers to the portion of the window that opens, as opposed to any fixed panes of glass, the frame, or any other structural material.

How Much Space Around the Window Is Required?

If it opens into a window well, a basement egress window requires a minimum of 550 mm of clear space. If the egress window is unobstructed, the minimum space requirements apply; in particular, the window opening must meet the minimum requirements, regardless of the style of window.

Replacing a Code-Compliant Basement Window

When replacing a basement egress window, the new one must meet the specific minimum requirements as outlined above. A common error is to assume that the current window, even if it is known to be a code-compliant window, is big enough.

Codes change, and assuming the existing window’s dimensions are sufficient can be a costly mistake. The only way to be certain is to follow the guidelines when installing a new window, regardless of the code-compliance of the old window.

Final Thoughts

Whether you are building an extra bedroom, an in-law suite, or a self-contained rental unit, the Ontario building code for egress windows must be followed, not just for the sake of permits or insurance, but for the safety of those who will use the new space. How many egress windows are required in a basement? Any enclosed bedroom requires its own egress window unless there is an external door in that room with direct access to the exterior. These are guidelines for Ontario, and although other provinces will have similar guidelines, the specifics will vary.

If you are installing security bars, it is required that they have an interior quick-release mechanism that does not require tools or keys to open. Any other system violates not only the building code but is also extremely dangerous. Poorly installed security bars can trap someone in the unit during a fire.

If you have a heritage home, the guidelines will vary depending on the municipality, but in general, the egress codes must be followed while maintaining the exterior trim and design. This is a complicated process, and you will need to start early and consult heritage experts.

Contact Harmony Basements for more on basement finishes and renovations to add egress windows.


Source

Disclaimer: all images are owned and copyright by their respective owners and website (harmonybasements.ca) and “https://madcitybasement.com/blog” is for news, information, product news and reviews.

Cost-Effective Basement Renovation Ideas for Homeowners

If you’ve been staring at that unfinished basement and thinking, “We could really use the space,” you’re not alone. Many families along the Wasatch Front want more room without paying for a big addition. A well-planned, Cost-effective basement renovation can give you a bright family room, a smart guest suite, or a hobby zone—without breaking your budget. You know what? It starts with choices that earn their keep over time. Let me explain.


The big three: dry, safe, warm

Before any pretty finishes, take care of the fundamentals. Basements behave differently than upstairs rooms, and that matters for comfort and cost. In our climate, water, air, and heat are the three forces you plan around. Get those right, and everything else gets easier and cheaper.

Moisture first. Utah basements don’t see Florida-style humidity, but spring runoff, high water tables, and sprinkler overspray can push moisture through concrete. Seal any cracks, slope soil away from the house, and add a vapor barrier behind framed walls. A simple 6-mil poly or a dedicated membrane like Delta-FL under flooring can save future headaches. If you’ve noticed musty smells, budget for a quiet, energy-smart dehumidifier. It’s boring—but it’s gold.

Safety next. If you’re adding a bedroom, you’ll likely need an egress window that meets Utah code. That means adequate height and width and a proper window well with a ladder. It’s an upfront cost that boosts resale and gives real peace of mind. Many homes in Salt Lake County, Davis County, and Utah County also test for radon; the fix is usually a straightforward vent system. Small line item. Big safety win.

Warmth that lasts. Insulation in basements matters as much as upstairs, sometimes more. We often recommend rigid foam (XPS or EPS) against concrete walls, then framed walls with mineral wool or fiberglass. It keeps walls warmer and reduces condensation. For floors, consider insulated subfloor panels under LVP if you spend lots of time downstairs. Your feet will thank you in January.


Smart planning that saves money

Layout decisions drive cost. A few smart moves in the plan can shave thousands off your project and keep it feeling open and bright.

  • Cluster the plumbing. Keep new baths, laundry, or wet Bars near existing supply and drain lines. Shorter runs equal smaller bills.
  • Work with the mechanicals. The furnace, water heater, and main trunk lines are like a tree’s trunk—don’t fight them. We build soffits that look intentional, not like afterthoughts.
  • Borrow light. Place the family room near Windows. Use glass doors for offices and borrow daylight with interior windows or clerestory openings.
  • Plan storage on purpose. That odd bump-out under the Stairs? It’s perfect for a coat nook, holiday bins, or a shallow craft closet with pegboard. Storage solutions let you finish fewer square feet because the space actually works.

Permits and inspections aren’t just boxes to check; they protect you. They also keep appraisers happy when you sell. We handle all that for you, including drawings that meet local building codes across the Wasatch Front.


Phased Finishing: breathe easy, build smart

Not everything has to happen at once. A phased approach lets you spread costs and still enjoy the space as you go.

Phase one: framing, rough-ins (electrical, plumbing, HVAC), insulation, and drywall. You’ll lock in the layout and the big systems. It’s the backbone.

Phase two: flooring, doors, trim, and paint. This is where the space starts to feel real.

Phase three: the fun stuff—built-ins, feature walls, wet bar details, and furniture.

Honestly, we’ve seen families watch a game in a nearly completed family room while we finish the guest bath down the hall. It’s not glamorous, but it’s real life, and the savings are too.


Materials that look high-end without the price tag

You don’t need luxury everything. Pick a few upgrades where you’ll feel or see the difference, then keep the rest simple and durable.

Floors that shrug off spills

Luxury vinyl plank—think LifeProof, COREtec, or Shaw—handles kids, pets, and the occasional spill. It clicks together fast and sits well on flat concrete. For cozy areas, use a breathable carpet tile with moisture-safe backing. Area rugs warm up movie night and can be cleaned or swapped later.

Ceilings that hide the guts—and still look sharp

You’ve got choices: paint the joists black for a loft look, do drywall for a sleek finish, or use a modern drop ceiling that lets you reach pipes. Today’s tiles don’t look like office panels. We’ve used smooth 2×2 tiles with clean grid systems that feel polished.

Walls and trim that stretch the budget

On walls, a smooth drywall finish with a washable eggshell paint (Sherwin-Williams or Benjamin Moore) is plenty. Save your feature wall money for a small section with vertical shiplap, a slat wall, or a simple box trim pattern. Doors? Solid-core for Bedrooms and baths (sound matters), hollow-core for closets. It’s a neat compromise.


Light and color tricks for bright basements

Basements get a bad rap because they’re dark. Change the light and you change the mood—on a budget.

  • Use LED wafers instead of cans. They’re thin, energy-smart, and easy to place around joists. We like 3000K–3500K color temperature for warm, natural light.
  • Layer the lighting. Overhead wafers plus floor lamps for glow, plus under-cabinet strips at a wet bar or craft zone. Layers create a high-end feel with low-cost fixtures.
  • Pick paint the room loves. Light grays with a soft beige undertone or tender whites with warm depth fight the basement blues. Think BM Classic Gray or SW Alabaster for most spaces.
  • Mirrors and glass. A framed mirror in the hall or a glass panel door on the office bounces light and makes spaces feel wider.

Here’s the thing: when lighting feels balanced, even budget finishes look great. Your eyes read “finished,” not “frugal.”


Rooms that earn their keep: flexible is frugal

Every square foot should pull double duty. That’s how you save now and later.

  • Guest suite that doubles as a teen hangout. Add a closet and a pull-out sofa. A pocket door to the bath is a quiet hero—privacy without the swing space.
  • Workout room / office hybrid. Rubber tiles on half the floor, a simple standing desk, and a mirrored panel. When life changes, the room changes with you.
  • Media room with daylight. Yes, you can have both. Blackout shades for movie time, easy-open blinds for daytime. Don’t bury the windows if you don’t have to.

Thinking about a basement apartment or “mother-in-law” suite? It can be a great investment, but rules vary by city. We help you check local requirements for parking, ceiling heights, fire separation, and separate entrances across places like Draper, Bountiful, Lehi, and Orem.


DIY vs. pro: where to roll up your sleeves

Some tasks are perfect for handy homeowners. Others, not so much. Picking the right mix keeps costs in check and schedules sane.

  • DIY-friendly: painting, installing LVP, basic trim, simple shelving, and hardware. You’ll see the savings and the wins are repeatable.
  • Hire out: framing tied to structure, electrical, plumbing, HVAC changes, drywall taping, and egress windows. These affect safety, code, and comfort. It’s worth the licensed touch.

You can also split the work. We prep the space, you handle finishes, we come back for final touches. It’s a team sport.


Real-world costs along the Wasatch Front

Let’s talk numbers. Costs vary by size, finish level, and the age of your home, but here’s a helpful range for basement finishing in Salt Lake County, Davis County, and Utah County as of this year.

  • Basic finish: open family room, storage, one bath rough-in. Many projects land between $40–$65 per square foot.
  • Mid-level: add a bedroom, nicer flooring, finished bath. Often $60–$90 per square foot.
  • Higher finish: multiple bedrooms, bath with tile shower, wet bar, ceiling details. Commonly $85–$130 per square foot.

Where does the savings hide? Right here.

Cost-saving move Typical savings Notes
Cluster bathroom near existing drains $1,500–$4,000 Shorter runs; fewer concrete cuts
LED wafers vs. traditional cans $300–$800 per room Less labor; slimmer profile
Painted open ceiling $2–$4 per sq. ft. Modern look; easy access later
LVP instead of tile $3–$7 per sq. ft. Warmer underfoot; faster install
Feature wall vs. full-room upgrades $600–$2,000 Spend where eyes land
DIY paint and trim $1,000–$5,000 Sweat equity that shows

Also check for local rebates. Rocky Mountain Power sometimes offers incentives for energy-efficient lighting and smart thermostats. Those little credits sweeten the deal.


Storage, sound, and small comforts

Your future self will thank you for these quiet wins.

  • Built-ins where it counts. A 12-inch-deep cabinet run under the stairs can swallow board games, camping gear, and seasonal stuff. Shallow shelves stay tidy.
  • Soundproof the essentials. Use mineral wool (like Rockwool Safe’n’Sound) in bath and bedroom walls. Add solid-core doors and weatherstripping. Noise drops, sleep improves.
  • Quiet fans and smart vents. Bath fans with low sone ratings keep steam at bay without sounding like a jet. Return-air upgrades help the basement breathe like the rest of the home.
  • Charging and Wi‑Fi. Conduits for low-voltage lines and a central Wi‑Fi access point keep your streaming smooth. It’s a small line that pays off every day.

It sounds like overkill. It isn’t. These are the touches that make a basement feel like the favorite room, not the extra one.


Seasonal timing along the Wasatch Front

Timing affects cost and convenience more than most people expect. Spring can be busy with egress window excavations, and summer humidity spikes can slow drywall mud. Winter is great for interior work—predictable schedules, fewer delays, and contractors often have more openings. If you’re eyeing a family room for football season or a guest suite before the holidays, we’ll build a schedule that hits your milestone.

One more local tip: if your yard gets soggy during snowmelt, we like to plan exterior window wells and drainage work either before the freeze or after the big thaw. Better working conditions, cleaner results.


We’re neighbors. We live and work here, and we’ve finished basements from Sugar House to Kaysville, Sandy to Saratoga Springs. That local knowledge pays off, especially when you want a sharp finish without a wild budget.

  • Clear pricing and scope. You’ll see what’s included—no vague allowances that balloon later.
  • Value engineering. We suggest swaps that keep the look and lower the spend. Think tile where it counts, LVP where it works, and millwork that makes a wall sing.
  • Permit-ready plans. We handle drawings and inspections across Salt Lake County, Davis County, and Utah County.
  • Trade discounts. We share our pricing on fixtures and finishes from reliable brands. Simple, honest savings.

If you already have a Pinterest board, bring it. If you don’t, we’ll help you build a clear plan, from first sketch to the final coat of paint.


Frequently asked quick hits

How long does a typical finish take? Most projects run 6–12 weeks after permits. Size, complexity, and inspections drive the timeline.

Do I need an egress window for a bedroom? Yes. It’s required by code and crucial for safety. We’ll measure, design, and install it the right way.

What flooring is best for basements? LVP or engineered flooring that tolerates moisture swings. We like LVP for durability and value. Add area rugs for comfort.

Can we keep a space unfinished for storage? Absolutely. We often frame and insulate the walls around a storage zone, then install a simple door. You get energy savings and a tidy spot for totes.


A quick word on style: keep it you

Minimalist? Cozy mountain? Modern farmhouse? We’ve seen it all work downstairs. The trick is editing. Pick a clean base—calm wall color, consistent flooring—and add character with one or two focal points. A slatted wood panel behind the TV. A rich paint color in the niche by the stairs. A hit of patterned tile on a wet bar splash. Small moves, big personality.


Ready when you are

Thinking about Utah basement finishing that respects your budget and your style? Let’s sketch the plan, price it clear, and make the space you’ll actually use. Call 801-515-3473 or Request a Free Quote and we’ll help you map out a smart, cost-effective build that fits your home—and your life.

Source

Disclaimer: all images are owned and copyright by their respective owners and website (utbasementfinishing.com) and “https://madcitybasement.com/blog” is for news, information, product news and reviews.

Garage Customization Calgary | The Garage Store

Your Garage Should Be Built for You

Every homeowner uses their garage differently. Garage customization Calgary services allow you to design a space that reflects your lifestyle, hobbies, and storage needs.

The Garage Store creates custom garage solutions that transform garages into personalized, efficient spaces.


What Customization Means

Customization goes beyond choosing colors. It means designing:

  • Storage placement

  • Work areas

  • Flooring systems

  • Lighting layouts

Everything is built around how you use your garage.


Designed for Calgary Living

Custom garages must perform year-round. Garage design Calgary projects focus on durability, moisture resistance, and efficient space use.

Custom features ensure your garage stays functional in every season.


Personalized Storage Systems

Personalized garage storage maximizes space without sacrificing accessibility. Custom cabinets, wall systems, and overhead racks keep everything organized and within reach.


Multi-Use Garage Spaces

Customized garages can serve multiple purposes:

  • Vehicle storage

  • Workshops

  • Fitness areas

  • Hobby zones

Smart layouts allow one space to do it all.


Long-Term Value

Customization adds both immediate enjoyment and long-term value. Buyers appreciate garages designed with intention and quality materials.


Why Customization Requires Experts

Custom garages require precise planning and professional installation. The Garage Store ensures your vision becomes reality without compromise.


Contact The Garage Store

If you’re ready to create a garage that truly fits your lifestyle, The Garage Store offers expert garage customization in Calgary. Our tailored designs combine durability, organization, and style. Contact us today to start building a garage that works as hard as you do.

Source

Disclaimer: all images are owned and copyright by their respective owners and website (blog.renovationfind.com) and “https://madcitybasement.com/blog” is for news, information, product news and reviews.

Search For Products

Product has been added to your cart