Maximizing Natural Light in Your Finished Basement

When it comes to transforming your finished basement into a bright and inviting living space, natural light is your best friend. While basements may not have the benefit of ample windows like upper levels, there are several clever design strategies you can use to maximize natural light and create a more open and welcoming atmosphere. At Utah Basement Finishing, we’re here to help you make the most of your basement’s potential. In this blog post, we’ll explore how to brighten up your basement by harnessing natural light.

The Importance of Natural Light

1. Aesthetic Appeal

Natural light enhances the aesthetics of your basement, making it feel less enclosed and more spacious.

2. Mood Enhancement

Sunlight can positively impact your mood, helping create a cheerful and pleasant environment.

3. Energy Efficiency

Utilizing natural light reduces the need for artificial lighting during the day, which can lead to energy savings.

4. Health Benefits

Exposure to natural light is linked to better sleep patterns, improved focus, and overall well-being.

Design Strategies for Natural Light

1. Egress Windows

Consider adding egress windows to your basement if feasible. These windows not only provide light but also serve as emergency exits.

2. Window Wells

Install window wells outside your basement windows. They allow more light to enter while providing a functional and aesthetic element.

3. Transom Windows

Transom windows are small windows placed above standard windows or doors. They let in additional light without compromising privacy.

4. Glass French Doors

If your basement has a walkout or separate entrance, consider installing glass French doors. They allow abundant natural light to flood the space.

5. Light-Reflective Colors

Choose light, reflective colors for your walls, ceiling, and flooring. Light colors bounce natural light around the room.

Maximizing Open Space

1. Open Floor Plan

Design your basement with an open floor plan to allow light to flow freely from one area to another.

2. Remove Unnecessary Walls

Consider removing non-load-bearing walls or using partial walls to maintain structural integrity while promoting light penetration.

3. Use Mirrors

Strategically place mirrors on walls to reflect light and create the illusion of more space.

Proper Lighting Fixtures

1. Layered Lighting

Supplement natural light with layered artificial lighting, including ambient, task, and accent lighting, for a well-lit basement day and night.

2. Light Bulb Selection

Choose energy-efficient LED bulbs that mimic natural light to create a brighter and more natural ambiance.

Consult with Utah Basement Finishing

At Utah Basement Finishing, we have experience in maximizing natural light in finished basements. Our team can work closely with you to design a basement that harnesses the beauty of natural light while meeting your specific needs and preferences.

Embrace the Light

A well-lit finished basement is not only visually appealing but also contributes to your well-being and comfort. By implementing these design strategies, you can embrace the light and transform your basement into a vibrant living space.

Ready to brighten up your basement? Contact us today at 801-669-8106 or visit our website here to discuss your vision and start the journey to a brighter basement.

Source

Disclaimer: all images are owned and copyright by their respective owners and website (utbasementfinishing.com) and “https://madcitybasement.com/blog” is for news, information, product news and reviews.

Sara Bella Calgary Company Online Review & Ratings

Innovative, stylish and energy-efficient window fashions in Calgary.

Sara Bella Blinds & Design is a Calgary-based custom blinds business emphasizing high-quality European material window fashions. The company has over 17 years of industry experience, though it was founded in 2016.

Sara Bella Blinds brings together craftsmanship, innovation, and timeless design to redefine what custom blinds can do for Calgary homes. Known for its commitment to the highest quality, Sara Bella blends safety, efficiency, and sophistication to create window coverings that are beautiful and functional. They manufacture their products locally.

Moreover, Sara Bella offers cordless designs that are child- and pet-safe, creating a worry-free environment for families. They also have energy-efficient options and can add convenience to your home with motorized blinds. The company’s custom-made, European designs also add a unique, high-end aesthetic that elevates any living space.

Sara Bella Blinds helps clients achieve the perfect balance between light control and privacy. Each design reduces glare, blocks harmful UV rays, and improves insulation.

Sara Bella’s design team is dedicated to providing a personalized experience through detailed consultations and a full selection of sample materials. Every blind is tailored to the customer’s preferences and budget, ensuring the finished product fits seamlessly into their home.

Additionally, they offer a 5-Year Limited Warranty covering defects in materials, workmanship, and operation.

Start your project. Contact Sara Bella for a consultation!

Source

Disclaimer: all images are owned and copyright by their respective owners and website (blog.renovationfind.com) and “https://madcitybasement.com/blog” is for news, information, product news and reviews.

How to Choose the Best Lighting for Your Basement Remodel

A well-lit basement doesn’t just look better—it feels bigger, warmer, and more inviting. But basements can be tricky. Lower ceilings, fewer Windows, and different zones competing for attention. The right lighting plan balances all that, so your remodel doesn’t end up bright in the wrong places and dim where you need it most. If you live along the Wasatch Front—Salt Lake County, Davis County, or Utah County—you also know winter’s short days add pressure to get this right. Let’s make your basement feel like the favorite room in the house.


Start with the big question: what’s this space for?

Lighting should follow function, not the other way around. Are you building a family hangout, a home theater, a guest suite, or a work-from-home nook that doesn’t feel like a cave? Different uses need different levels of light and different fixture types.

Here’s a simple yardstick: think in lumens per square foot. For general living spaces, aim for 20–30 lumens per square foot. For task zones—desks, craft tables, laundry counters—target 50–70. Media rooms? Lower overall light with dimming and soft accents. It sounds technical, but it saves you from guesswork later.

You know what? It helps to sketch zones on a floor plan: seating, pathways, bar, play area, storage. That quick doodle becomes your lighting roadmap.


Basement reality check: natural light is limited, so fake it smart

Even with egress windows and wells, basements in Utah don’t get much sunlight. That’s okay. You can “borrow” brightness with wall-washing fixtures and lighter paint (look for high LRV paint—think 70+). Mirrors help, but they aren’t magic; the lighting still does the heavy lifting.

A gentle trick: light the walls more than the floor. When walls feel bright, the room reads as larger. Recessed wall-wash trims or adjustable downlights aimed at art or shelves work wonders, especially in long, narrow rooms.


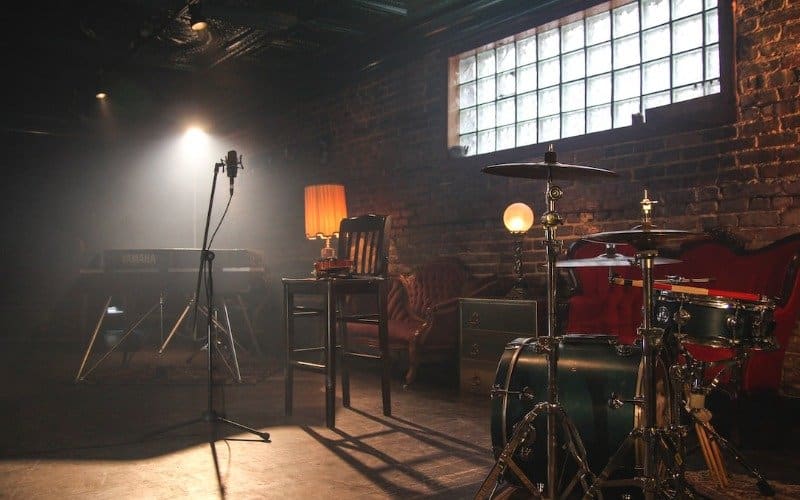
Layered lighting: the not-so-secret sauce

One ceiling light in the middle won’t cut it. Most basements need three layers:

  • Ambient – Your base layer. Think recessed LED wafers, low-profile flush mounts, or linear fixtures. Soft, even light that fills the room.
  • Task – Focused light where you work: pendants over a bar, under-cabinet strips, a floor lamp by the reading chair, a desk lamp with a high-CRI LED.
  • Accent – The mood layer. Wall sconces, picture lights, LED strips on shelves, or behind the TV for bias lighting.

Here’s the contradiction: bright is good… until it’s not. A media room wants cozy layers and deep dimming, while a craft table needs clarity and punch. The trick is giving each zone its own control.


Fixtures that play nice with lower ceilings

Utah basements often have 7 to 8 foot ceilings. That changes your fixture choices. Anything bulky will feel heavy overhead. Keep it slim, safe, and straightforward:

  • 4-inch canless LEDs – Ultra-thin, IC-rated wafers tuck neatly into tight joists. Use baffle trims to cut glare.
  • Low-profile flush mounts – Great for Bedrooms, storage rooms, or hallways. Look for 90+ CRI models if this will be a guest space.
  • Pendants (carefully) – Over a bar or game table, keep the drop tight so no one bumps a head. Frosted or fabric shades soften hotspots.
  • LED strips – Under shelves, stair skirting, or cove details. Subtle and surprisingly helpful for wayfinding at night.

Spacing recessed lights? A simple rule: space them about half the ceiling height. With an 8-foot ceiling, that’s roughly 4 feet between fixtures, and about 2 feet off the walls. Adjust for furniture and focal points.


Color temperature and CRI: how the room actually feels

Color temperature is measured in Kelvin (K). Lower numbers look warmer, like a cozy lamp. Higher numbers look cooler, more like daylight. CRI (Color Rendering Index) tells you how true colors appear under the light.

General guide for basements along the Wasatch Front:

  • 2700–3000K – Warm, relaxing. Great for family rooms and theaters.
  • 3000–3500K – Neutral and versatile. Works for playrooms and multipurpose spaces.
  • 3500–4000K – Brighter, crisper. Good for offices, craft tables, and laundry areas.
  • CRI 90+ – Preferred where skin tones, fabrics, and wood matter (guest rooms, offices, and Bars). Look for R9 values above 50 for better reds.

Honestly, adjustable-white fixtures are worth it. Set 4000K for work-from-home days, then warm it to 2700K for movie night. You’ll use that feature more than you think.


Smart controls and dimming: less fiddling, more comfort

Separate the basement into zones and give each zone dimming. It sounds fancy, but it’s really about everyday comfort. A few brands we trust locally:

  • Lutron Caséta or Maestro – Rock-solid dimming with LED compatibility. Caséta pairs with smart homes easily.
  • Leviton Decora Smart – Clean look, reliable apps, and smooth scenes.
  • Philips Hue – Great for accent lighting, color scenes, and bias lighting behind TVs.

For storage rooms and the under-Stairs closet, vacancy sensors are a small luxury—lights only turn on when you want them to. And remember, stairways usually need a 3-way control; it’s safer and code-friendly.


Glare, shadows, and “Why does my TV feel too bright?”

Glare sneaks up on you. Put a downlight directly above a sofa and you’ll see it reflected on the TV. Aim them slightly behind the seating line or toward the walls. For bars, skip clear-glass pendants unless the bulbs are frosted or shaded. Harsh points of light make a space feel harsher than it is.

Bias lighting behind a TV (an LED strip) reduces eye strain and makes blacks look richer. It’s a small trick with a big payoff.


Energy, Cost, and the long game

LEDs save money and stay cool. That matters in basements where airflow can be limited. Look for ENERGY STAR ratings and dimmer compatibility specifically listed on the box—this helps prevent flicker. A 9–12W LED roughly equals an old 60W bulb, and the light quality is better when CRI is high.

Plan for fewer watts per circuit than you think. The savings add up, and you’ll have headroom if you add fixtures later. Also, go with IC-rated sealed fixtures for recessed cans in basements—less air leakage and more comfort in January.


Common mistakes we see (and how to dodge them)

  • Too few fixtures – Then you chase brightness with brighter bulbs and get glare. Start with even coverage, then layer.
  • One switch for everything – Zones need their own control. It’s not a mansion thing; it’s a comfort thing.
  • Cool, blue light everywhere – 5000K feels chilly in a basement. Keep cooler light for task corners only.
  • Ignoring furniture layout – Plan lights around where heads, eyes, and screens will be. Your couch matters more than your ceiling joists.
  • No dimming – You’ll want it, especially in the evening. It’s budget-friendly now and priceless later.
  • Shiny trims – High-gloss reflectors look sleek but can glare. Baffles are kinder on eyes.

A simple plan you can sketch tonight

Let me explain how we’d rough-in a 300 sq ft family room with an 8-foot ceiling that doubles as a play space:

We’d target about 6,000–9,000 lumens total. That could look like 8 recessed 4-inch wafers at ~800 lumens each (6,400 lumens), plus a couple of lamps and a slim wall sconce. Place recessed fixtures ~4 feet apart, keep them about 2 feet off the walls, and leave a “quiet” area above the TV to reduce reflection. Add LED strip bias lighting behind the screen. Then, set all ceiling lights on a dimmer and give the sconce its own switch.

For a small office corner (say 5×8), we’d warm things a bit but keep clarity: a 3500K flush mount overhead, 90+ CRI, plus a task lamp aimed at the desk—not your eyes. It’s a tiny zone; it still deserves its own control.

And if there’s a wet bar? Two small pendants with frosted glass over the counter, under-cabinet LED tape at 3000K, and a dimmer that nudges the bar slightly darker than the seating area. Subtle, but it sets the mood.


Seasonal sanity: Utah winters and summer nights

In January, when the inversion hangs low and sunsets are basically a rumor, warm dimming helps the whole basement feel welcoming. Choose fixtures that can slide from 3000K down to 2200K in the evening. In July, when the basement is your cool retreat after a day up Big Cottonwood, bump the color temperature back up for crisp detail on game night.

Small touch, big difference.


Products and specs we reach for (because they behave)

We’re brand-agnostic, but a few things consistently make basements better:

  • 4″ IC-rated wafer lights – 700–900 lumens, 90+ CRI, selectable 2700–4000K, baffle trim, airtight.
  • Under-cabinet LED tape – 90+ CRI, diffused channels, hardwired with a dimmer. No “dots” on the backsplash.
  • Lutron Caséta dimmers – Reliable with LEDs, smart scenes you’ll actually use.
  • Quality lamps – Floor and table lamps aren’t afterthoughts; they finish the room. Look for shades that hide the bulb.

One more nerdy note: pick drivers and dimmers that promise low flicker at every level. Your eyes will thank you during long movie nights.


Safety and code: the quick version

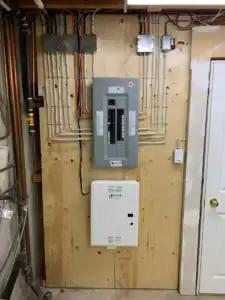
Use IC-rated, airtight recessed fixtures for insulated ceilings; it’s safer and keeps heat where it belongs. Put GFCI protection near wet bars and sinks. Stairways need proper illumination with two switches. And for anything complicated—new circuits, panel work, or smart systems—bring in a licensed electrician. We handle all that when we remodel; you shouldn’t have to worry about it.


Ready to make it feel like the upstairs—only better?

Lighting is where a basement goes from finished to fantastic. The right layout, the right color temp, the right dimmers—it’s the polish you notice every day, especially here in Utah with our bright summers and dim winters. If you want a plan that fits your space, your family, and your budget, we’re happy to help.

Call Utah Basement Finishing at 801-515-3473 or Request a Free Quote. We’ll listen, measure, sketch, and build a lighting plan that makes your remodel shine—literally and figuratively.

Source

Disclaimer: all images are owned and copyright by their respective owners and website (utbasementfinishing.com) and “https://madcitybasement.com/blog” is for news, information, product news and reviews.

SolarNinjas Energy Solutions Edmonton Company Online Review & Ratings

SolarNinjas Energy Solutions is the trusted expert for solar panel installation in Edmonton and the surrounding area. They design and install solar power systems for homeowners and businesses and have built a solid reputation in the industry. Their high online review rating is evidence of a commitment to quality work and customer satisfaction. Customers testify about the quality of their work and products, excellent service, fair pricing, and approachable staff.

If you’re thinking about going solar, connecting with this RenovationFind Certified company is a wise first step!

Disclaimer: These reviews were taken from Google and submitted between June and October 2025.

I hired SolarNinjas in 2019 to do a residential overhead to underground conversation of a AC power secondary cable. This installation work included two new AC Distribution Panels and Communication Cabinets in my house and garage.

The project manager (John) was also the lead electrician who worked on the installation. John is very knowledgeable about the Canadian Electrical Code and made extra effort to ensure that everything was done correctly. He was also quick to respond to any concerns or questions I had about the installation work.

In parallel with the electrical work that SolarNinjas was doing at my property, I had hired other contractors for different home renovation work. John ensured that the electrical work was done on time to not interfere with the other contractors’ work.

Below are some before and after pictures of the AC Distribution Panel area. I highly recommend SolarNinjas and I wouldn’t consider any other company for electrical related projects!

– Brett G.


If you’re looking for a solar install done with care and quality, Solar Ninjas is the company to go to. They are completely transparent in their process, take a ton of photos, and do a great job. Kyle especially was great, always going above and beyond with communication and updates.

Mike and Kyle are probably the most experienced solar installers in town and have all the right connections to get things through the process fast. I never had to wait for permits or other things.

The truth about this industry is that unfortunately, there are a lot of companies out there that have come in to make a quick buck and destroy your roof in the process. Don’t cheap out when it comes to the roof of your house and pick a company like Solar Ninjas that prides itself on top notch quality.

– Andrew Lu


We had the pleasure of working with SolarNinjas on two occasions. First was the installation of a charging outlet in the garage for our electric car. This included the upgrade of our main electrical panel for additional capacity, and to future-proof for the addition of Solar PV. The second engagement we had with SolarNinjas was to design, supply, and install a Solar PV system on our house roof. They were very professional, knowledgable and thorough from the initial planning session all the way through successful installation and testing. All Permit/City/Inspector interactions were handled on my behalf making the entire process seamless.

We highly recommend SolarNinjas for Solar PV and/or general Electrical services in the Edmonton area.

– Craig Miller

Source

Disclaimer: all images are owned and copyright by their respective owners and website (blog.renovationfind.com) and “https://madcitybasement.com/blog” is for news, information, product news and reviews.

Basement Finishing for Music Lovers: Creating a Soundproof Space

For music enthusiasts, having a dedicated space in your home where you can immerse yourself in your passion without disturbing others is a dream come true. A finished basement can be transformed into a soundproof haven for musicians, singers, or audiophiles. At Utah Basement Finishing, we understand the importance of creating a soundproof space for music lovers, and in this blog post, we’ll explore how to achieve just that.

The Joy of a Soundproof Basement

1. Uninterrupted Practice

A soundproof basement allows you to practice your instrument, vocals, or DJ skills without worrying about noise complaints from family members or neighbors.

2. Immersive Listening

Create a space where you can enjoy your favorite music or audio content with unparalleled sound quality. Immerse yourself in your passion without distractions.

3. Recording Studio

For musicians and producers, a soundproof basement can serve as a home recording studio, where you can capture your musical creations without external interference.

4. Family Harmony

A soundproof basement ensures that your musical pursuits won’t disrupt the peace and quiet of the rest of your home, fostering family harmony.

Soundproofing Your Basement

1. Acoustic Insulation

Invest in high-quality acoustic insulation materials to minimize sound transmission through walls and ceilings. This includes acoustic panels, acoustic foam, and mass-loaded vinyl.

2. Double Drywall

Install double layers of drywall on walls and ceilings with an air gap in between. This helps block sound effectively.

3. Sealing Gaps

Seal any gaps or cracks in walls, ceilings, and floors to prevent sound leakage. Use acoustic sealants for this purpose.

4. Resilient Channels

Install resilient channels on walls and ceilings to create separation between the drywall and the structural elements. This further reduces sound transmission.

5. Soundproof Doors and Windows

Opt for soundproof doors and windows that are specifically designed to block sound waves. Proper weatherstripping and seals are essential.

Customization and Design

1. Acoustic Treatments

Incorporate acoustic treatments into your basement’s design. These can include bass traps, diffusers, and absorbers to improve sound quality.

2. Floating Floors

Consider installing floating floors with underlayment designed for sound reduction. This helps isolate your space from the floor below.

3. Soundproof Curtains

Use soundproof curtains or drapes to control sound reflections and enhance the acoustics of your space.

4. Personalized Decor

Design your soundproof basement to reflect your musical tastes and style. Create an inspiring environment that encourages creativity.

Consult with Utah Basement Finishing

At Utah Basement Finishing, we have experience in designing and building soundproof spaces for music lovers. Our team can work closely with you to ensure that your finished basement not only looks great but also delivers exceptional soundproofing performance.

Elevate Your Musical Experience

A soundproof basement is more than just a music room; it’s a sanctuary for your musical passions and a place where you can fully immerse yourself in the world of sound. Whether you’re jamming with your band, recording music, or simply enjoying your favorite tunes, a soundproof basement enhances your musical experience.

Ready to create your soundproof space for music? Contact us today at 801-669-8106 or visit our website here to discuss your vision and embark on the journey to design your perfect soundproof basement.

Source

Disclaimer: all images are owned and copyright by their respective owners and website (utbasementfinishing.com) and “https://madcitybasement.com/blog” is for news, information, product news and reviews.

The Best 5 Window Repair Companies in Winnipeg

Sunday Closed
Monday 8 a.m.–5p.m.
Tuesday 8 a.m.–5 p.m.
Wednesday 8 a.m.–5 p.m.
Thursday 8 a.m.–5 p.m.
Friday 8 a.m.–5 p.m.
Saturday Closed

Hi-Tech Energy Windows Ltd. is a proudly family and Metis-owned Winnipeg company known for its innovation and craftsmanship. They design and manufacture custom, energy-efficient, and high-security windows and doors right here in Manitoba. Every product is built to deliver exceptional durability and thermal performance, thanks to its exclusive Hi-Tech SuperCORE technology. These windows are engineered to handle Canada’s most brutal weather. Their commitment to quality and performance has earned Hi-Tech Energy Windows recognition as one of Canada’s Top 10 Window Manufacturers.

In addition, Hi-Tech Energy Windows Ltd. offers glass replacement for your current windows. Whether the glass is cracked or foggy, or you want an energy-efficient upgrade, their superior glass products will help you reach your goals. Visit them online and call Hi-Tech Energy Windows for a consultation on your home project.

Key Services & Features

  • New window replacements
  • New Entry door replacements
  • Glass services: glass upgrades
  • 100% Indigenous-owned
  • ENERGY STAR-certified
  • Lifetime transferable warranty
  • Designed and manufactured products in Winnipeg
  • Flexible financing options

Customer Feedback

On two separate occasions, I purchased windows for my home through Hi-Tech Windows. I am pleased with the quality of the product and the installation. I dealt with Rick Klassen and was extremely satisfied with the service I received. Rick is professional, knowledgeable, and presents a no-pressure sales attitude. He followed through with all his commitments and returned calls and texts promptly. Rick and Hi-Tech earned my trust, and I would have no hesitation recommending them to others.

– Dave, Google


Window Repair FAQs

1. How do I know if my windows need repair or replacement?

If your windows have minor issues like broken hardware, damaged seals, or small cracks, repairs may be enough. However, if you’re dealing with persistent drafts, rot, condensation between panes, or outdated single-pane glass, replacement is usually the better long-term option. Contact a professional window company for advice on your situation.

2. Can I just replace the glass instead of the entire window?

Yes, in many cases, you can replace only the glass if the frame and seals are still in good shape. This option is more affordable than a full window replacement and can still restore clarity, comfort, and insulation performance. Glass replacement also makes the best sense if you have cracked or broken glass, but newer window frames.

3. Will replacing old window glass improve energy efficiency?

Absolutely. Upgrading to double- or triple-pane glass with low-emissivity (Low-E) coatings or inert gas fills can significantly reduce heat transfer. Even if you keep the existing frames, new energy-efficient glass can help lower your heating and cooling costs.

4. What should I do if my window glass is cracked?

If the glass is cracked, it’s best to replace it as soon as possible. Cracks can spread, reduce insulation, and even lead to safety hazards. Depending on the damage, a professional can replace just the pane rather than the entire window unit.

5. Is it cheaper to repair or replace windows?

Repairing windows is generally less expensive upfront, but frequent repairs can add up over time. If your windows are old or inefficient, replacing them can save money in the long run through improved energy efficiency and fewer maintenance costs. However, newer or high-quality windows that need service are worth repairing.

6. Can I repair foggy or condensation-filled windows?

If condensation appears between glass panes, the window seal is likely broken. Some companies specialize in resealing glass to stop the fogging. Determining whether you need a window repair or replacement in this instance depends on the age and condition of the window and your budget.

7. When is window repair the best choice?

Repair is ideal when issues are minor and isolated. For example, a cracked pane, worn weatherstripping, or broken latch. If the frame and structure are still solid, repairing can extend the life of your window.

8. How long do replacement windows typically last?

Quality replacement windows can last 20 to 30 years or more with proper care. The lifespan depends on the materials, installation quality, and how well they’re maintained. Most window companies offer a 25-year or lifetime warranty on their window and door products.

9. Will replacing my windows really improve energy efficiency?

Yes! Windows are the number one culprit for escaping energy in a home. New energy-efficient windows prevent heat loss in winter and keep your home cooler in summer. This can significantly lower your utility bills and increase year-round comfort.

10. Can damaged frames or rot be repaired?

Minor frame damage can sometimes be repaired, but if the rot has spread or compromised the structure, replacement is usually necessary to prevent further deterioration.

11. What’s the average cost difference between repair and replacement?

Costs vary by material and window type, but repairs can range from $100 to $400 per window. Replacements typically cost more upfront but offer greater savings and durability over time.

12. Should I replace all my windows at once or one at a time?

If your budget allows, replacing all windows at once ensures a consistent look and performance across your home. However, you can also replace them in stages, starting with the most damaged or inefficient ones first.

Source

Disclaimer: all images are owned and copyright by their respective owners and website (blog.renovationfind.com) and “https://madcitybasement.com/blog” is for news, information, product news and reviews.

0
Back to Top

Search For Products

Product has been added to your cart